Add Employee in Salary Details Through Excel/CSV For Correction Return
For Correction Return in Salary details, apart from the manual creation of the Employee, It can also be done through any of these two different formats either Excel or CSV, and get added to the list already present. This would save effort in entering data through formats of the software interface.
Importing data from Excel/CSV can be done in 3 steps:
1. Download the pre-defined blank Excel/CSV format in the desired location
2. Prepare the required data in this Excel/CSV sheet
3. Upload this data from the Excel/CSV sheet into the system
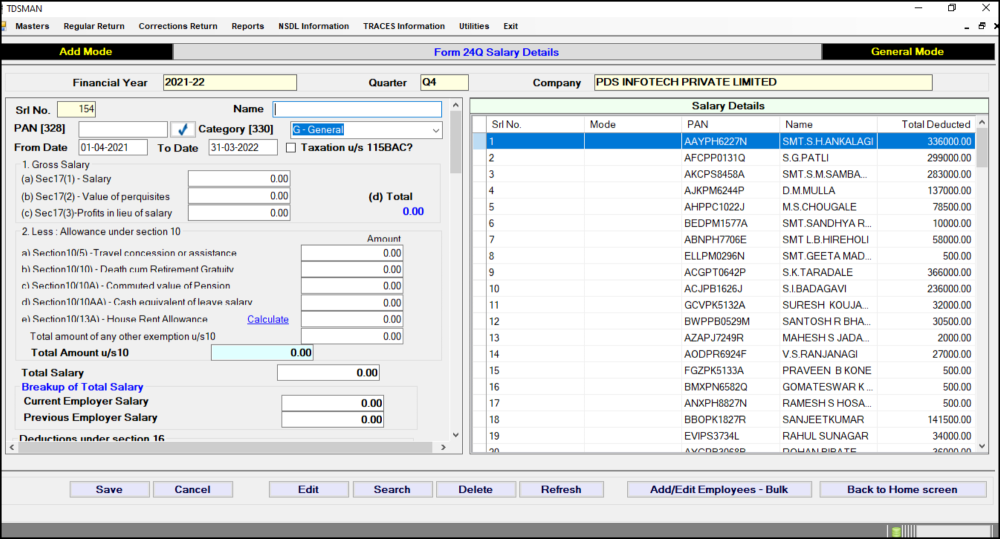
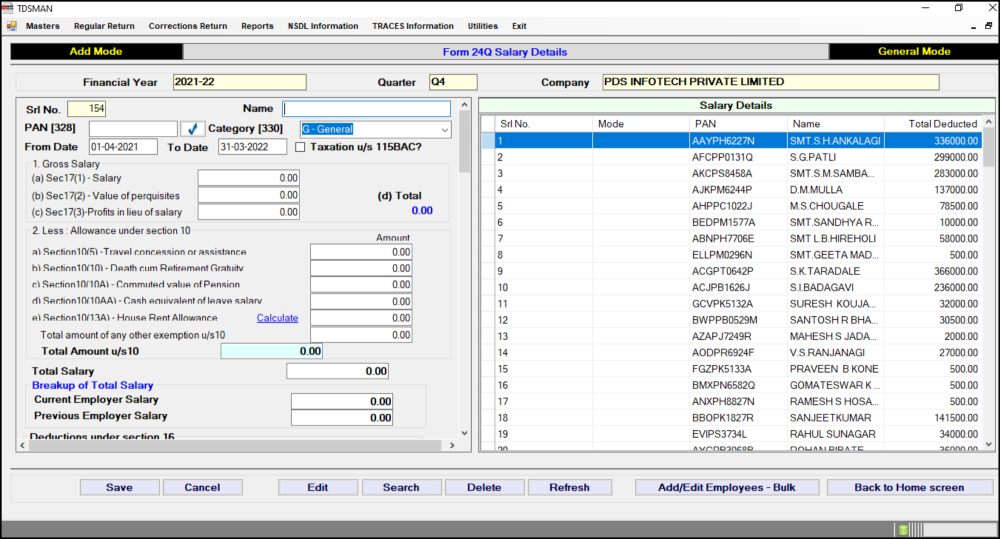
In order to import the data from Excel/CSV, Select the Correction Return which needs to be rectified. Select the Batch where the Employees need to be added. The following screen will appear:
Click on ‘Add/Edit Employees – Bulk’ button. The following screen will appear:
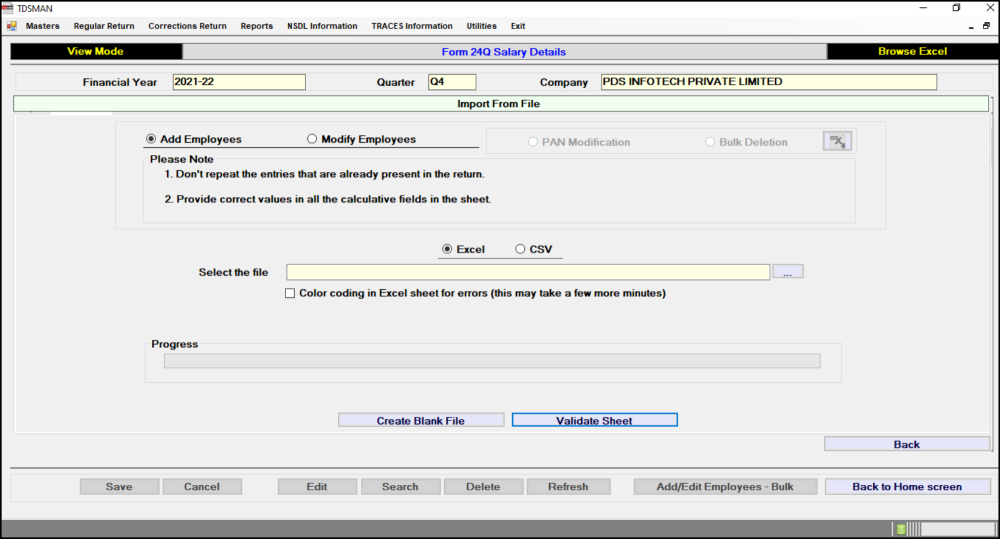
Click on ‘Add Employees’ button.
Further, we will be using the ‘Excel’ format to explain the operational procedures. However, the same can be similarly done through CSV format, by choosing the ‘CSV’ option. CSV is comparatively faster than Excel and also it is capable of handling larger volumes of data.
Select Excel then Click on ‘Create Blank File’ button to create the blank Excel file and save it in the desired location.
Prepare the Employee data in the blank sheet, make sure about the following:
i. Do not repeat the entries already present in the Return
ii. Enter correct value in the calculative fields
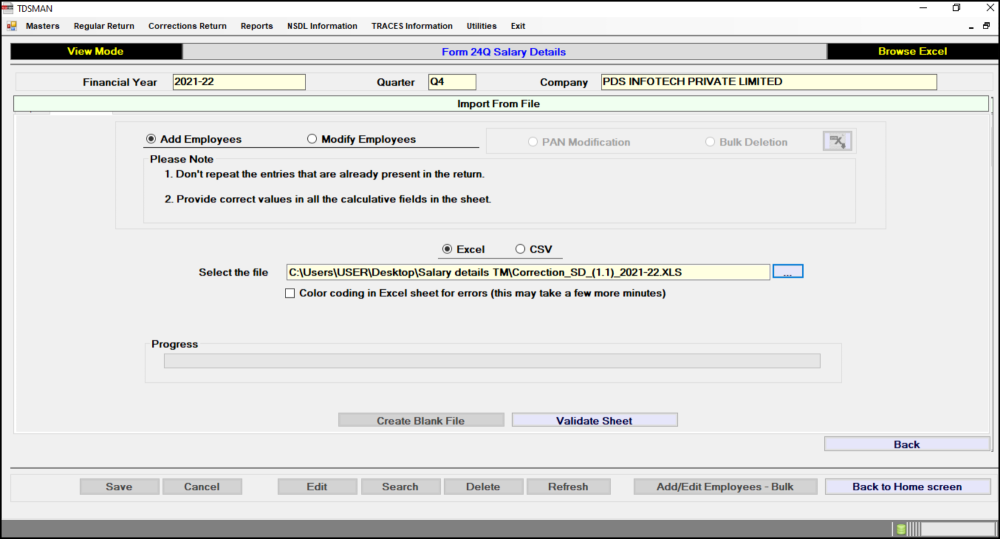
Enter the Excel file path from which the data has to be imported.
Color coding in Excel sheet for errors – If there is any error in the data provided in the Excel sheet, the system will highlight the same. The user is expected to rectify the data and import the entire file again. However, in order to display these errors using the color code, check this box. (This option is not applicable for CSV)
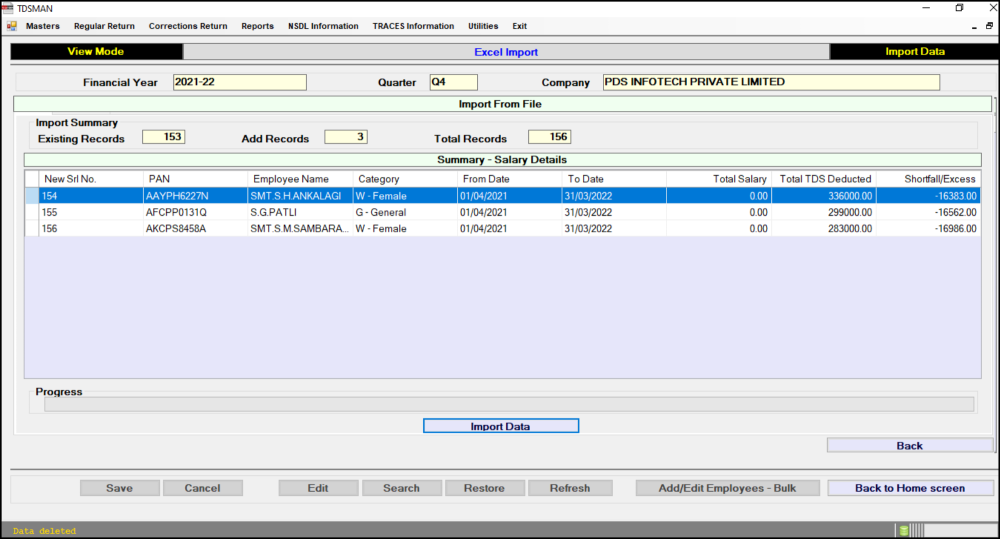
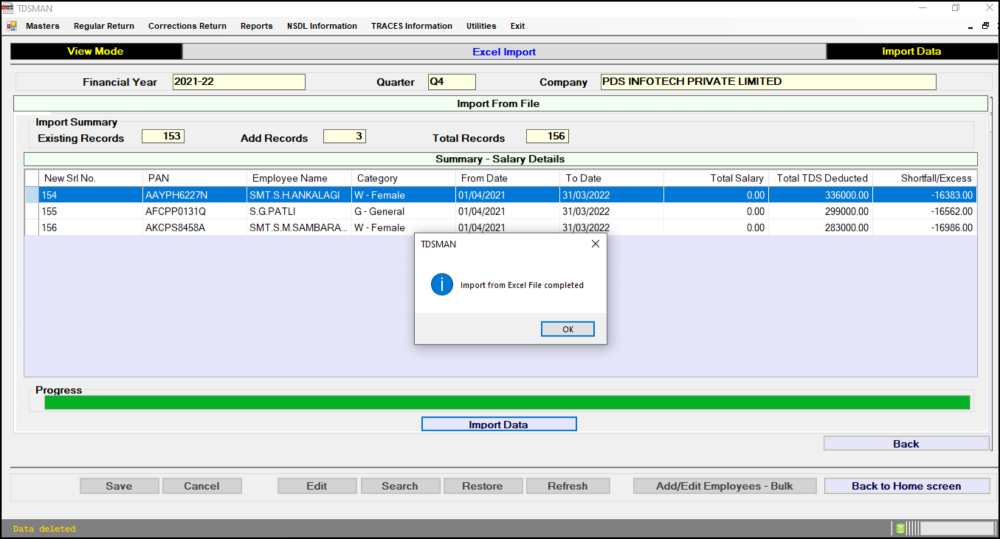
Validate Sheet: Click on ‘Validate Sheet’ button. The system will validate the excel data. If the data is correct then the following screen will appear :
Click on 
In case, there is any error in the data, the system will highlight the errors. The errors have to be rectified and the Excel sheet has to be imported again.
Modify PAN in Salary Details Through Excel For Correction Return
For Correction Return of the salary details, apart from manual modification of the PAN of Employee, it can also be modified through any of these two different formats either Excel or CSV and get imported into the system. This would save effort in entering data through formats of the software interface.
Importing data from Excel can be done in 3 steps:
1. Download the pre-defined blank Excel format in the desired location
2. Prepare the required data in this Excel sheet
3. Upload this data from the Excel sheet into the system
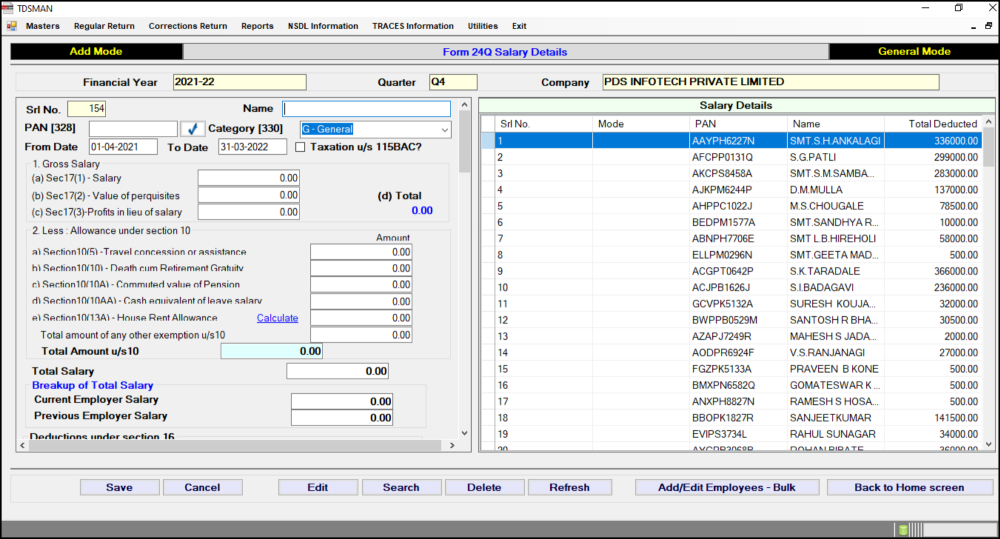
Select the Correction Return of the Salary Details which needs to be rectified. Select the Batch for which the PAN Number need to be corrected the following screen will appear:
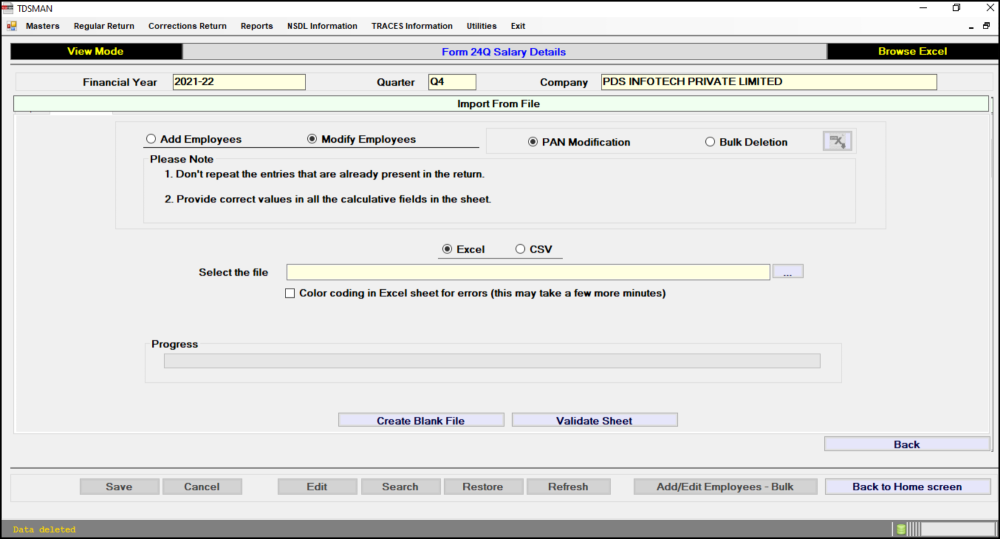
Click on ‘Add/Edit Employee – Bulk’ button. The following screen will appear:
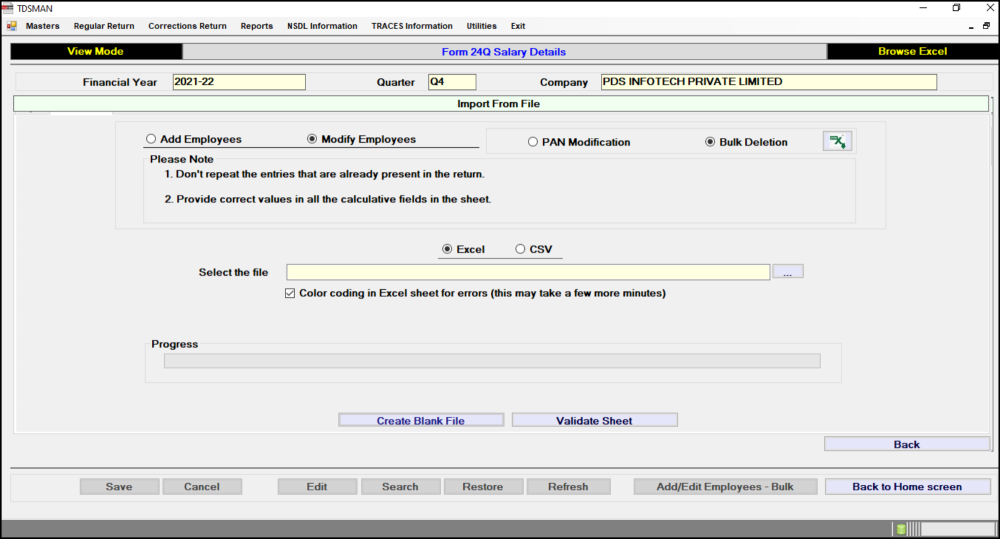
First click on “Modify Employees”, then click on “PAN Modification”.
Further, we will be using the ‘Excel’ option to explain the operational procedures. However, the same can be similarly done through CSV format, by choosing the ‘CSV’ option. CSV is comparatively faster than Excel and also it is capable of handling larger volumes of data.
Select Excel then Click on ‘Create Blank File’ to create the Excel file and save it in the desired location.
Prepare the PAN Modification Data in the Pre-defined blank sheet, make sure about the following:
The ‘SD No.’ , ’PAN of the Employee’ , and ‘Name of Employee’ as per Justification Report need to be placed in the Excel Sheet and the correct PAN under ‘NEW PAN’ has to be entered for each Record.
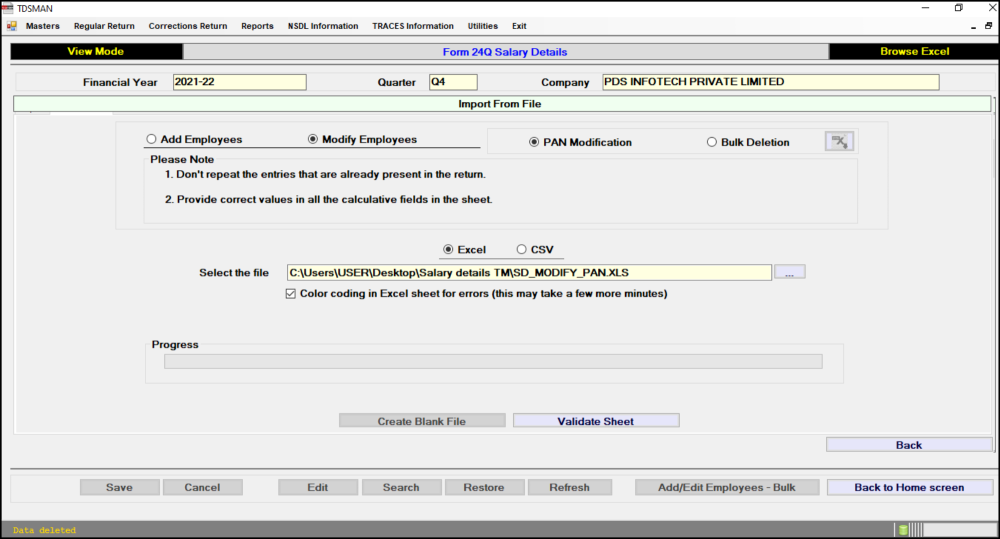
Excel File Path: Enter the Excel file path from which the data has to be imported
.
Color coding in Excel sheet for errors – If there is any error in the data provided in the Excel sheet, the system will highlight the same. The user is expected to rectify the data and import the entire file again. However, in order to display these errors using the color code, check this box. (This option is not applicable for CSV)
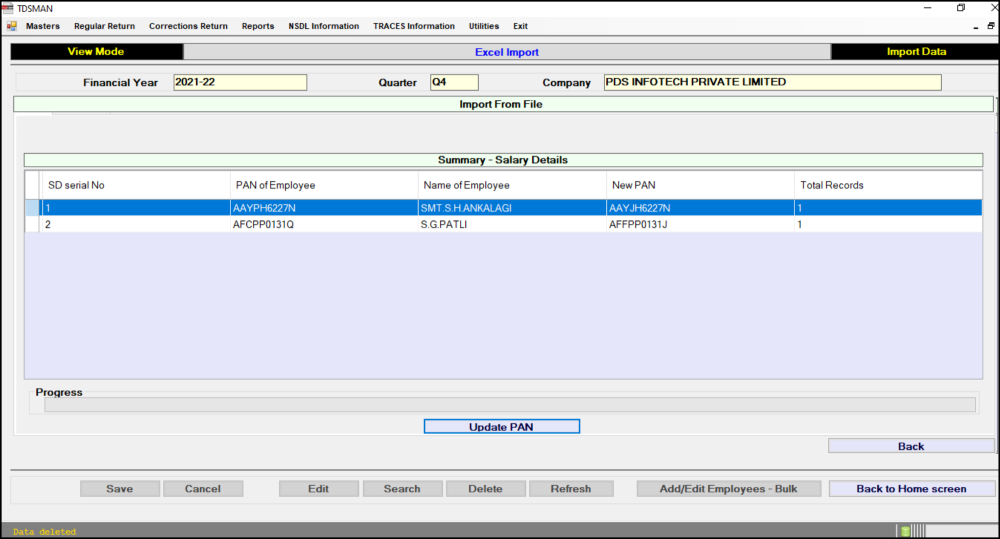
Validate Sheet: Click on ‘Validate Shheet’ the system will validate the excel data. If the data is correct then the following screen will appear:
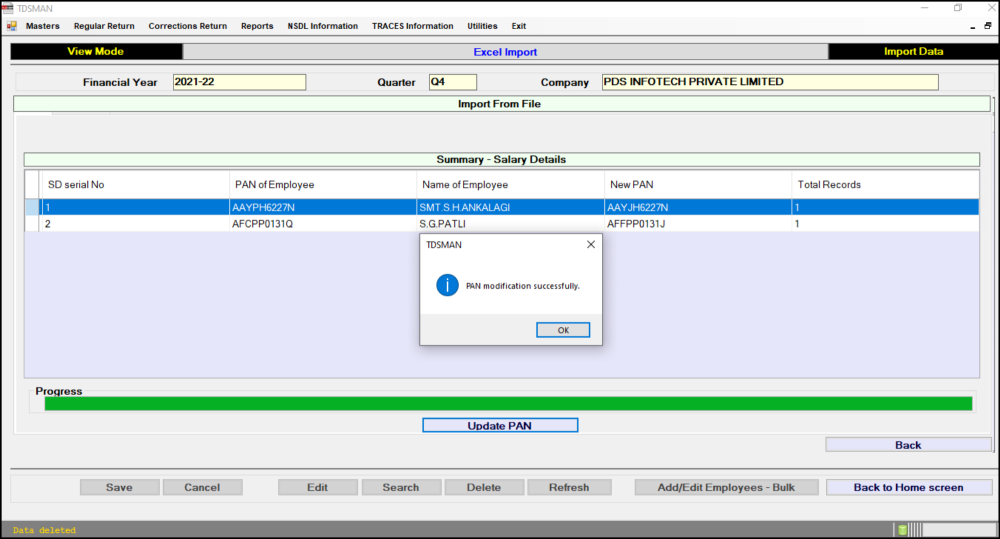
Click on ‘Update PAN’ button. The data will get imported into the system.
In case, there is any error in the data, the system will highlight the errors. The errors have to be rectified and the Excel sheet has to be imported again.
Bulk Deletation in Salary Details Through Excel/CSV For Correction Return
For Correction Return of Salary Details, apart from manual nullification of the Employee Salary Details, this can also be done through any of these two different formats either Excel or CSV and gets imported in the software. This would save effort in entering data through formats of the software interface.
Importing data from Excel/CSV can be done in 3 steps:
1. Export the desired record in the Excel/CSV sheet and store it in the desired location
2. Prepare the required data in this Excel/CSV sheet
3. Upload this data from the Excel/CSV sheet into the software
In order to import the data from Excel/CSV, Select the Correction Return that needs to be rectified. Select the Batch where the Employees need to be deleted. The following screen will appear:
Click on ‘Add/Edit Employees – Bulk’. The following screen will appear :
Further, we will be using the ‘Excel’ format to explain the operational procedures. However, the same can be similarly done through CSV format, by choosing the ‘CSV’ option. CSV is comparatively faster than Excel and also it is capable of handling larger volumes of data.
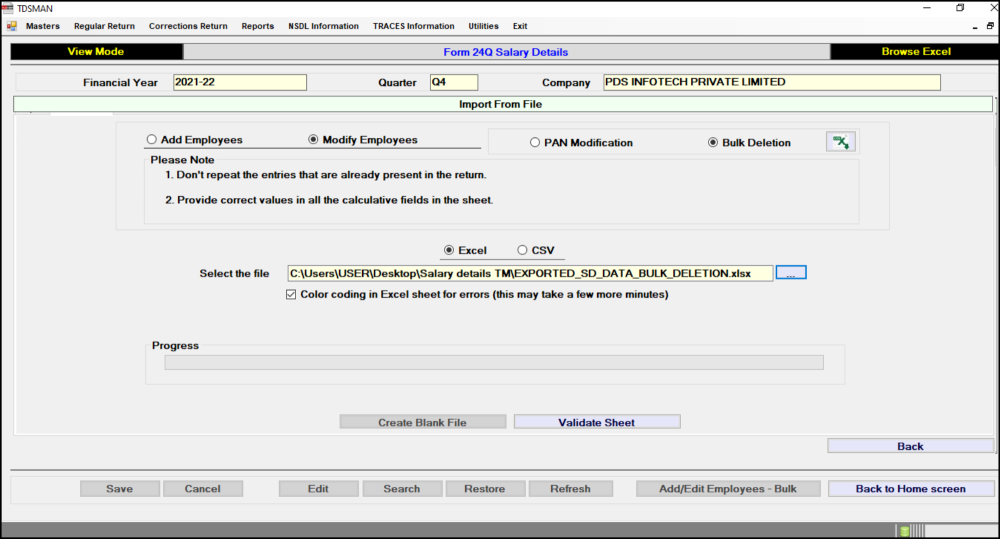
First click on “Modify Employees”, then click on “Bulk Deletation”.
The system gives the following options:
• To delete all the Salary details select “ALL” from dropdown
• To delete the employees of the specified salary details, select “ the specified Salary details”
Select the desired option and click on “Export Data for Bulk Nullify” 
Prepare the data in this Excel sheet. Keep only those employee records which need to be deleted. Remove all the other employee records. Do not tamper with any data in the Excel file.
Select Excel then Click on ‘Create Blank File’ button to create the blank Excel file and save it in the desired location.
Excel File Path: Enter the Excel file path from which the data has to be imported.
Color coding in Excel sheet for errors: If there is any error in the data provided in the Excel sheet, the system will highlight the same. The user is expected to rectify the data and import the entire file again. However, in order to display these errors using the color code, check this box. (This option is not applicable for CSV)
Validate Excel File: Click on the “Validate Sheet” button. The system will validate the Excel data.
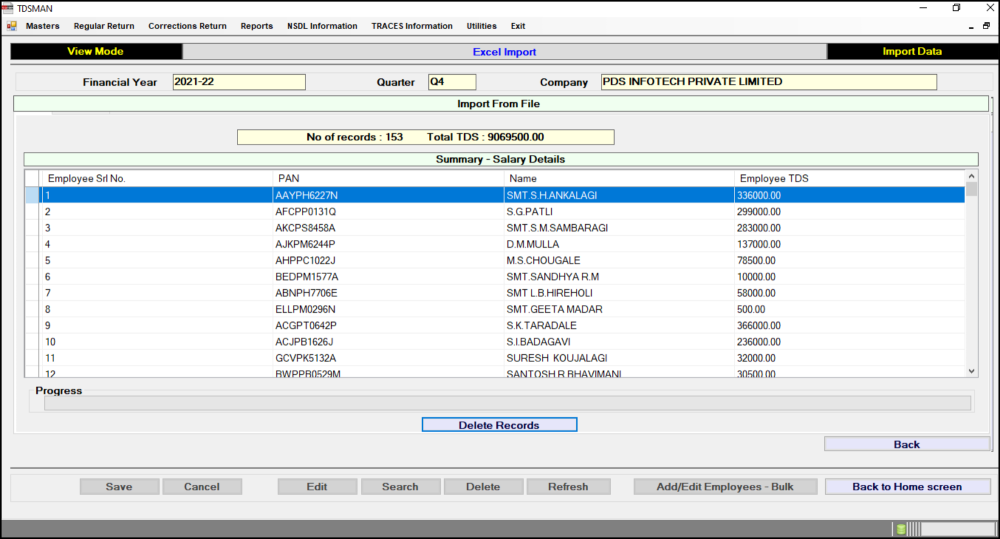
If the data is correct then the following screen will appear:
If the data is correct then the following screen will appear :
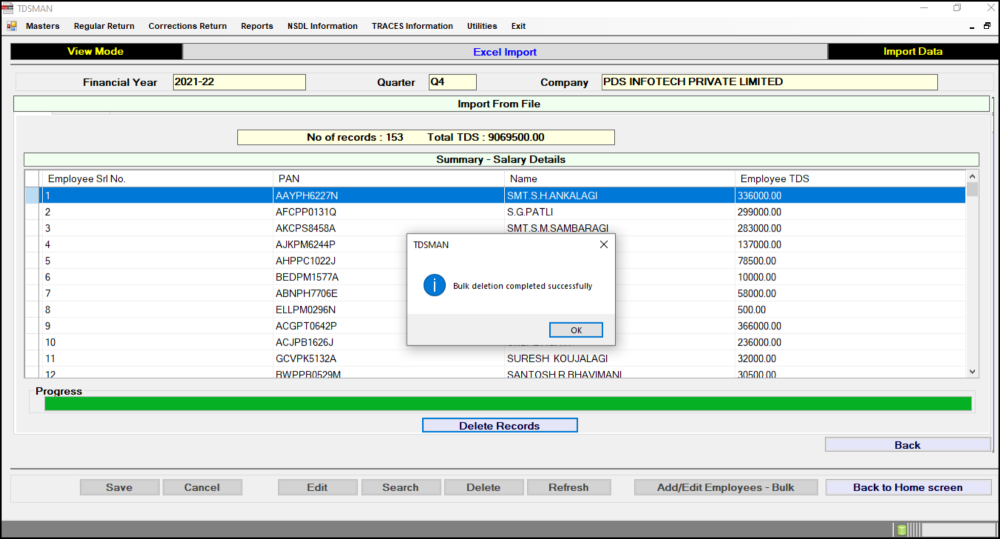
Click on 
In case, there is any error in the data, the system will highlight the errors. The errors have to be rectified and the Excel sheet has to be imported again.
Need more help with this?
TDSMAN - Support


